I have been asked a quite few times about how I do my stitched panoramas so I will take you through the steps as simply as I can. It is not an easy process and took me a lot of time and practice to get it to where I am happy. I use a variety of tools from a DSLR, panoramic head tripod, nodal rail, my drone etc etc, I may need to write another blog on it’s own for all that!
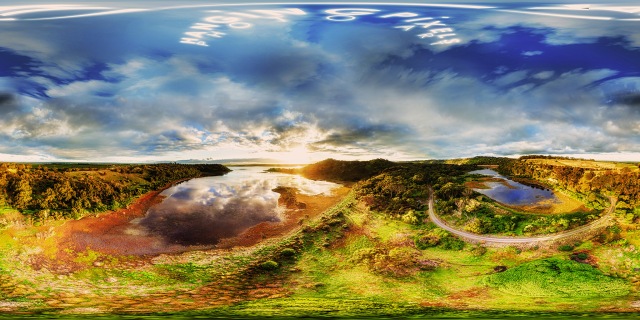
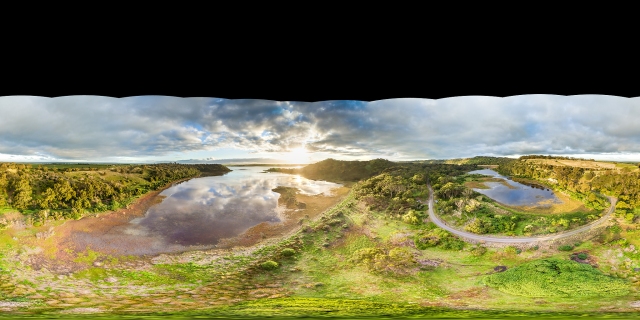
I been doing panoramas for quite a few years and now with Facebook 360º I can share my work to a wider audience. You can view the image above interactively here – Tower Hill 360º panorama. You can use your mouse to move around or by simply tilting your phone or tablet. If the horizon does not look right, please tilt your phone up to the ceiling and then back down to normal position, this should fix the viewing issue.
Normally, you would want to shoot in manual (exposure and white balance), this is done so that all your images will look uniform and correctly exposed. This works well when you have a scene that has similar dynamic range, tone and exposure. For aerial, I usually leave it in full auto as I let the camera expose according to what it is pointing at, otherwise I would end up with some very bright or very dark imaes.
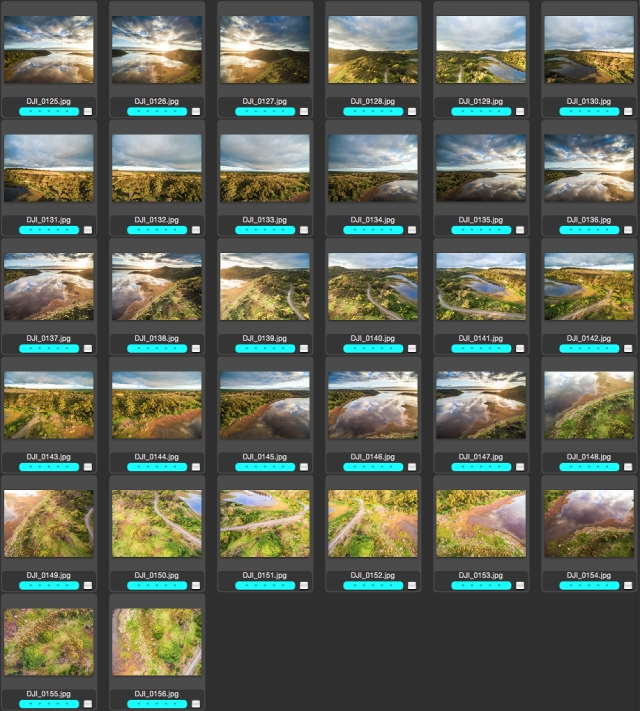
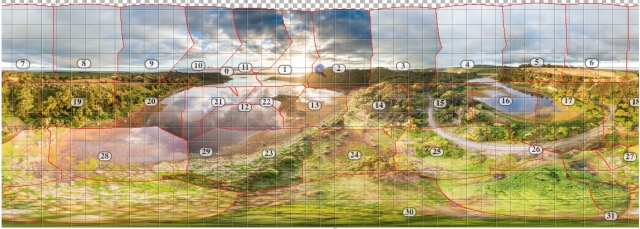
Make sure you have approximately a 30% overlap between each of the photos. This will ensure that you have enough data to process at a later stage. So basically, you take a photo, pan the camera to the right, take another shot and repeat until you get around to where you started. I usually yaw the camera itself with my inspire 1, this help minimise the movement of the drone and also reduce parallax error. With a phantom or any other drone, you can choose to yaw the aircraft itself. For 360º spherical, I would do a row of yaw/pan shots. With my DJI Inspire 1, I can also pitch the camera up slightly, I would do a yaw/pan shot, this will help me minimize my nadir hole. I then pitch the camera down 30º, do another yaw/pan series of shots, pitch the camera down another 30º, do another yaw/pan, take a nadir (down) shot, spin 90º, take another nadir shot. As per example below, the first roll comprised of 13 images. Next one is 11 and then the next are 7 images. Last two are the two nadir images. I believe you can also take a zenith (top) shot with your phone and use this as part of your stitch – I have yet to try this method.
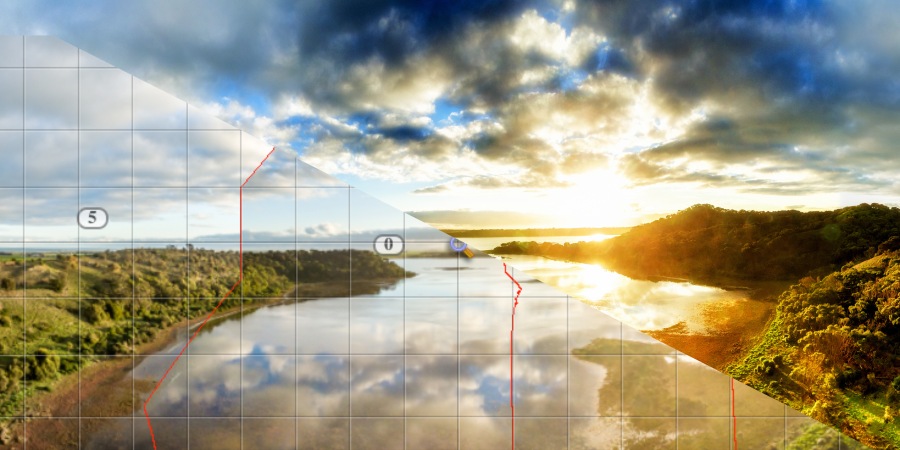
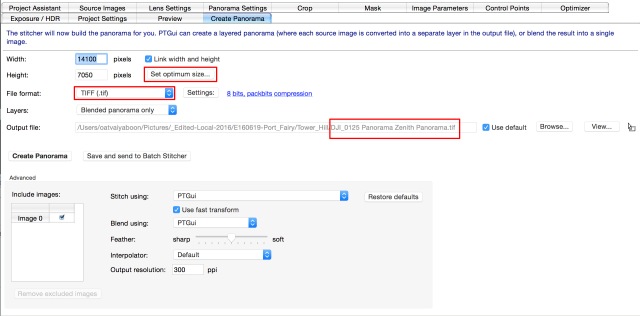
After the initial adjustment of individual images in LR (lens correction, exposure and white balance), I load them in PTGui PRO for stitching. You can use the built-in stitcher in LR or PS to simple stitch. I find PTGui to be one the best stitchers out there in both features and speed. After the initial alignment I get the image below. Make sure that all the images are aligned, if any of the images overlap too much it will confuse the program so you will need to delete them. If all the spherical image data is there, then you will get a complete 360º. If not, then you will need to patch it later. Go to “Create Panorama” tab, set optimum size (largest), change file type to tiff, check output path, change file name to “Pano-no_sky.tiff” and Create Panorama or Save and send to Batch Stitcher. You will have to come back to this file later.
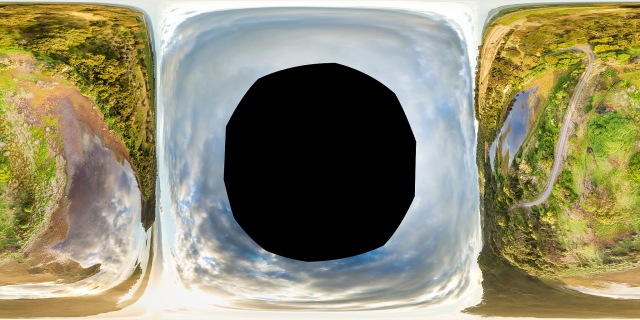
To patch the Zenith (top), I reload the file exported in step 3, “Pano-no_sky.tiff” into a new instance of PTGui. In Project Assistant tab, change Lens type to “Equirectangular panorama” with Hor. Field of View of 360º. Click Advanced button to access hidden tabs.

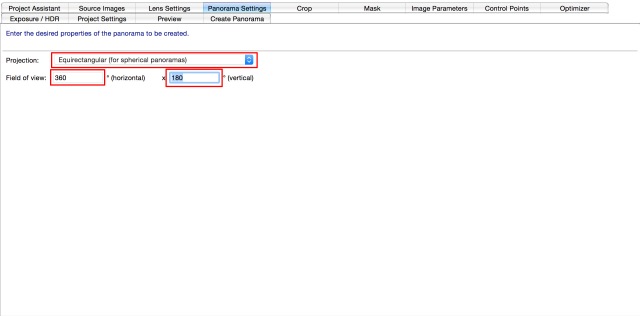
Find Panorama Settings tab, change Projection to “Equirectangular (for spherical panoramas)” FOV of 360ºx180º
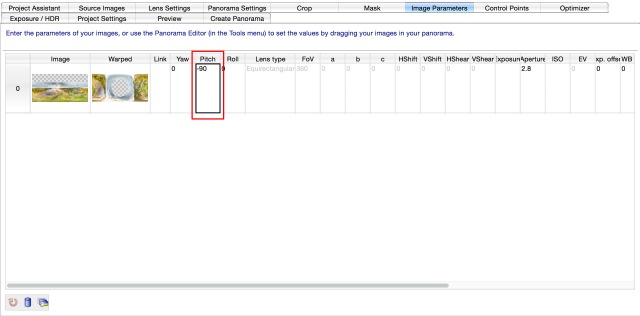
Find Image Parameters tab, change pitch to -90 to wrap the image in a way that it would be easier to edit the nadir.
Go back to Create Panorama tab and export full size image, rename this file to “Pano-zenith_edit.tiff”. Leave this PTGui open. Do not shut down the program.
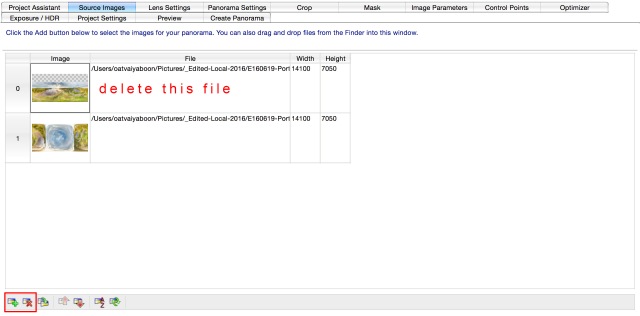
Open the file in photoshop to edit. After you edit the zenith in Photoshop with content aware fill or patch it with another sky, flatten the file, go back to PTGui that you had opened, under Source Images tab, click the import button (green +) to import fixed “Pano-zenith_edit.tiff”. You will need to delete the image that’s already in there as you will now have to transform this file into a normal panorama.
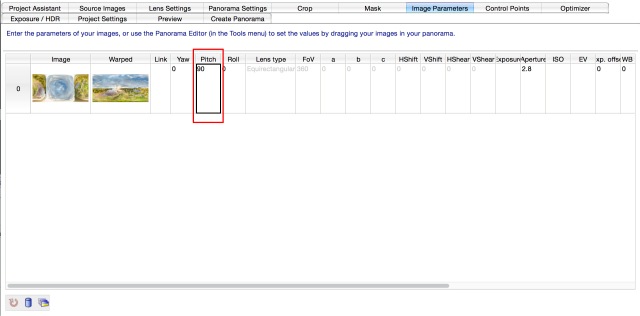
Go to Image Parameters tab, change the Pitch from 0 to 90 to wrap it back to a normal panorama.
Go to Create Panorama tab to export a complete equirectangular image. Be sure to set optimum size (largest), file type to tiff and file name to “Pano-with_sky.tiff”. NOTES: The exported file can be use as it is but due to wrapping and re-wrapping, you will loose some details in the image. Most people will not be able to tell this. So you can skip 11.
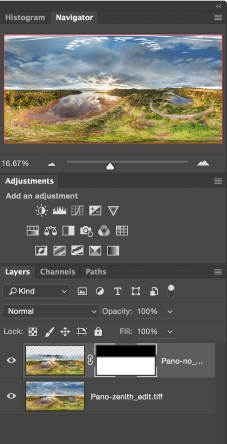
OPTIONAL: You now have the ground portion from “Pano-no_sky.tiff” and the sky portion from “Pano-zenith_edit.tiff”. Combine them in Photoshop by blending the two files together. I usually do this with a mask and layers. You can also download my template with 360º panoramic EXIF date already added here. This will allow you to simply resize your file, copy and paste into this template and export. Or you can use an EXIF utility available for your operating system to add the EXIF metadata later. I found AnalogExif (MAC) very useful and free. All you need to do is set the Camera manufacturer to RICOH and Camera model to RICOH THETA S.
Once you have finish editing your file. Resize it to 6000px X 3000px. Select all, and copy. Open my template, have a quick read and simply paste your image into it. Flatten and export as jpeg at minimal compression. Be sure to save your full size edit too.
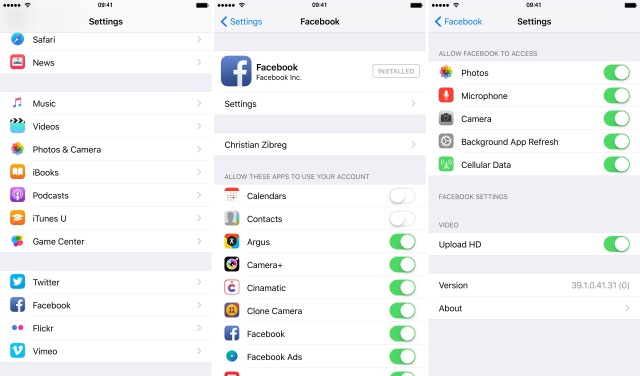
You are now ready to upload your 360º panorama to Facebook. After numerous trial and errors with uploading to Facebook. I have found that files uploaded via my iPhone look sharper and have less compression than the one uploaded from my desktop computer. I simply upload the image to my dropbox, download it onto my phone and upload via Facebook APP. NOTE: you will need to enable HD upload from your app.
Enjoy! Please comment below if you find this useful. Please subscribe to this blog, follow us on instagram and like us on Facebook. If you have any questions, feel free to contact me.